Tips: Use VMagicMirror for Web Meeting
This page introduces how to use VMagicMirror for web meeting like Zoom, using OBS Studio.
Preparation
Install OBS Studio, with version 26.0 or newer.
Latest version is recommended.
Before starting OBS Studio, start VMagicMirror.
Start OBS Studio.
First boot leads setup wizard. In this step any selection is okey.
Create a new scene by plus mark button on the left bottom, and set scene name like vmm_meeting.
Next, create a new source from plus button at the bottom of source list, select Game Capture, and set source name again like vmm.
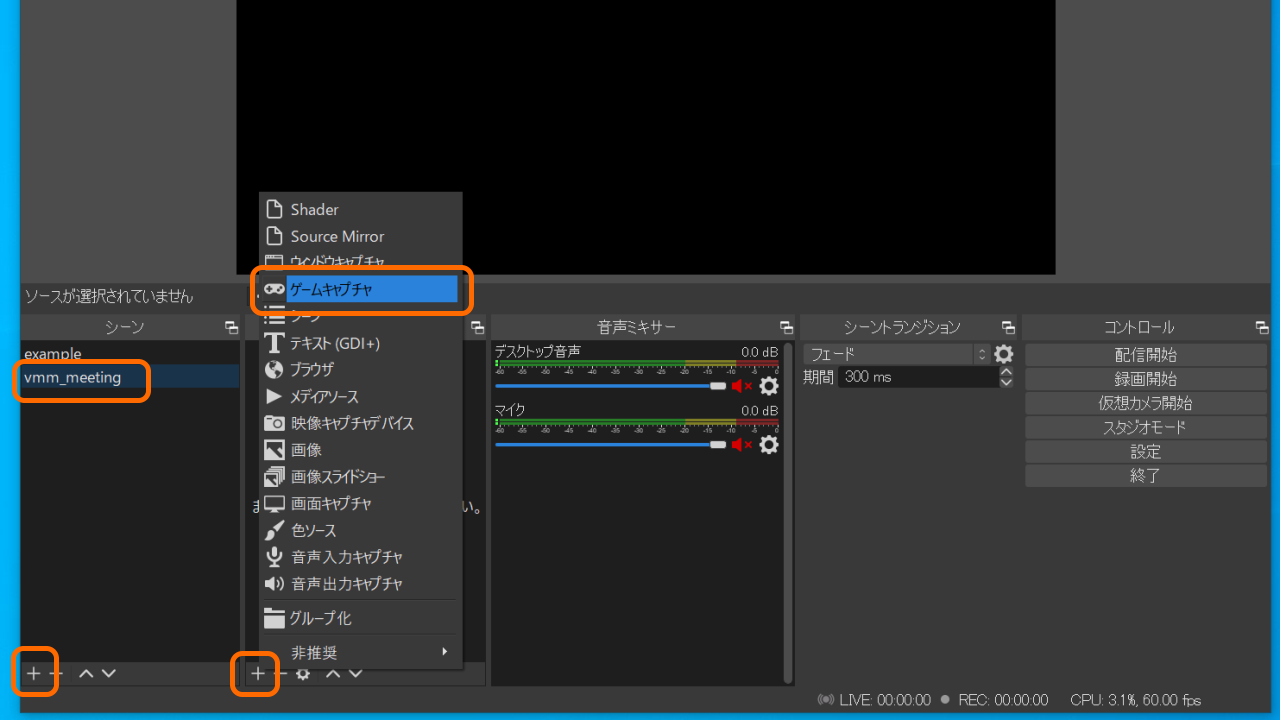
Then dialog will appear for the setup of game capture.
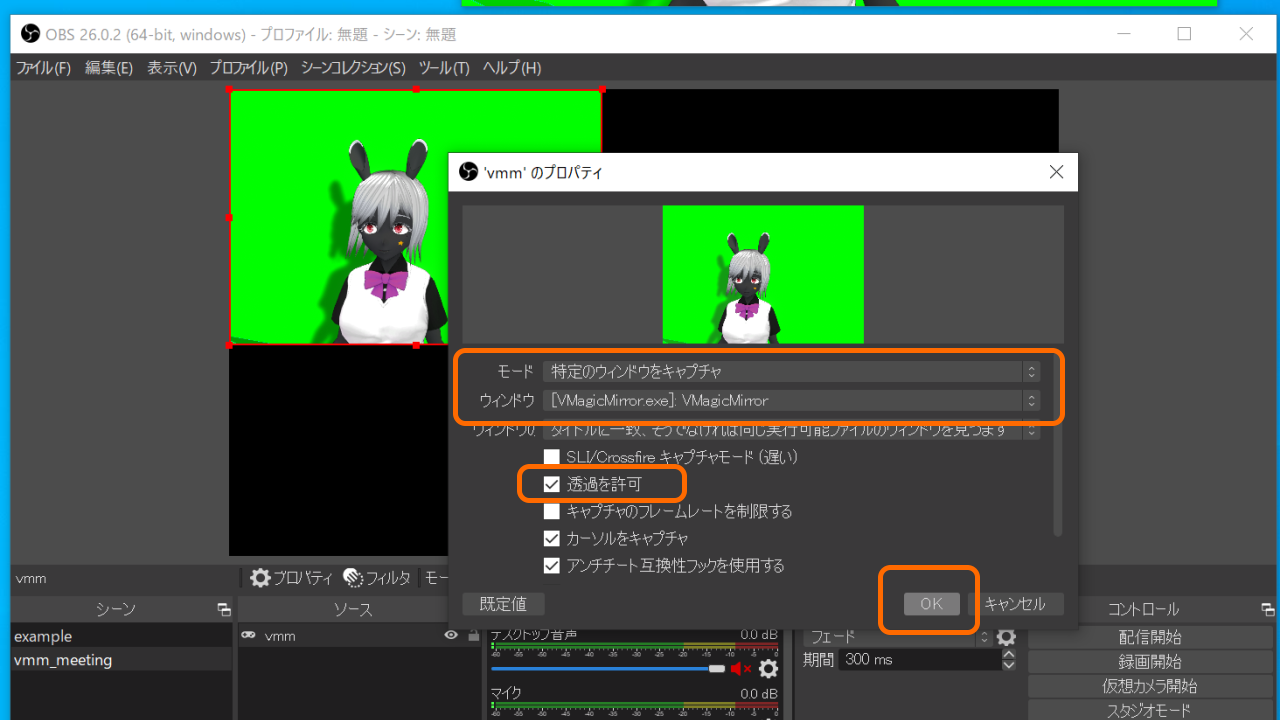
Select Mode to Capture Specific Window.
Click at the right of Window, and choose [VMagicMirror.exe]: VMagicMirror.
Check Allow Transparancy.
Click OK to save the setting.
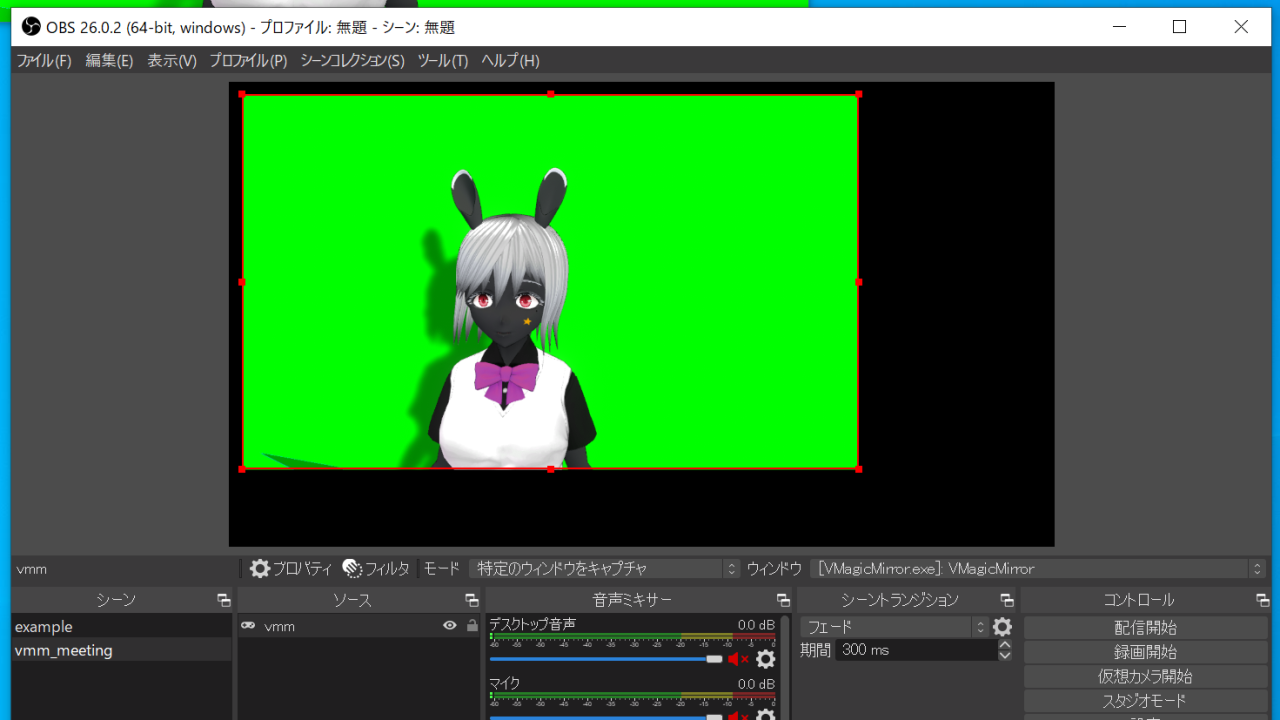
That’s all for the setting, and you will see VMagicMirror window in OBS Studio preview area.
If some area remains blank (black) in preview, then drag window area in OBS Studio to expand, or expand VMagicMirror window itself to adjust the appearance.
Attend Meeting
Before starting web meeting app, start VMagicMirror and OBS Studio.
Confirm that VMagicMirror appears in the preview are of OBS Studio.
If some area remains blank (black) in preview, then drag window area in OBS Studio to expand, or expand VMagicMirror window itself to adjust the appearance.
In OBS Studio, click Start Virtual Cam button on the right side.
Then start web meeting app to attend.
The meeting app should have webcam selection UI somewhere, so find it, and choose OBS Virtual Camera from the selection.
That’s it! VMagicMirror window should be visible on web meeting system.
After the meeting, stop virtual camera on OBS Studio to shut down output.
Note: Settings for Virtual Background
If you want to use web meeting specific virtual background system, then you will need to clear green background.
In this case, see VMagicMirror’s Streaming tab and see View, then turn off Keyboard and Avatar's Shadow.