Expressions
This page is about how to control face expression (and a few motions) in VMagicMirror.
This feature is called Word to Motion.
Overview
Word to Motion is the function to control avatar’s facial and motion expressions.
Originally this feature supports receiving word input (e.g. “joy”) to emotional expression, but now it also supports several input styles, as you would expect.
- Keyboard, word input base
- Gamepad, button input
- Keyboard, number key
- MIDI Controller

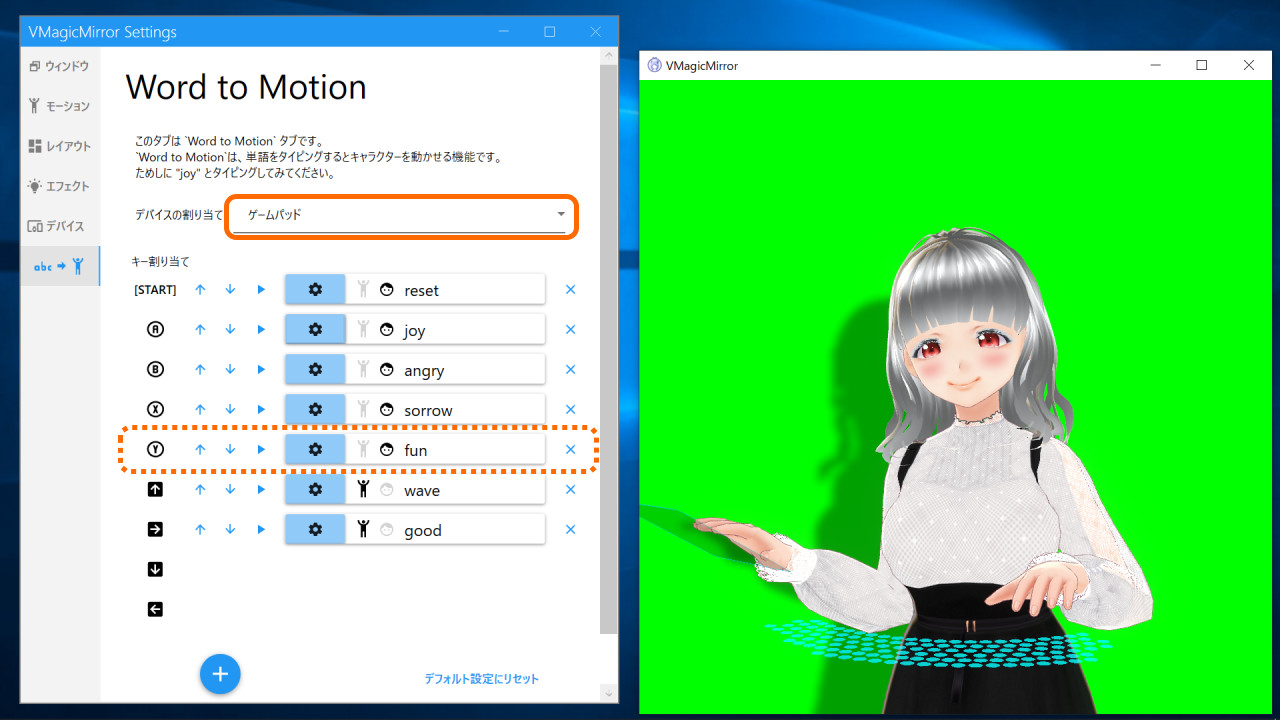
The example above shows Device Assignment selected to Gamepad and press Y button to launch fun expression.
You can sort items by up/down buttons at the left of each items, and can delete them by right x button.
To add and custom item, take the following steps.
- Press
+button to add a new item. If you custom existing item, skip it. - Press
Settingbutton to open the setting. - In the custom window you can setup motion and face blend shape.
- Press
OKto confirm your custom.
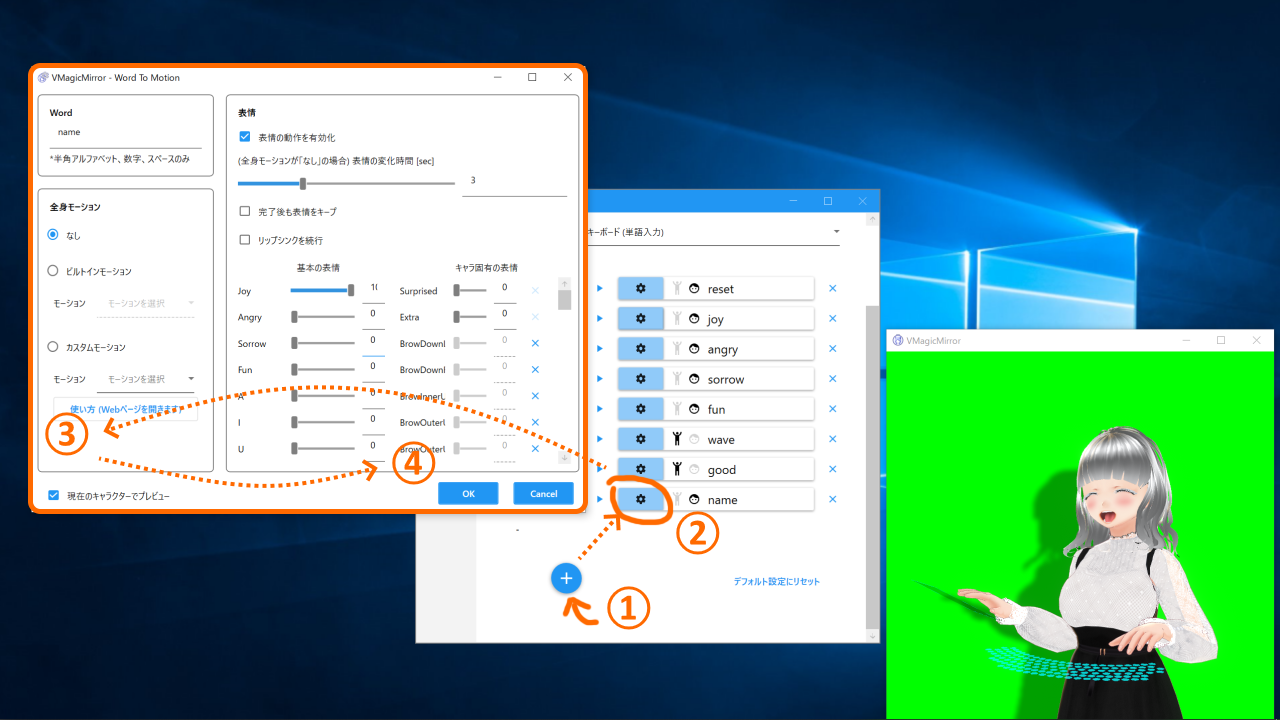
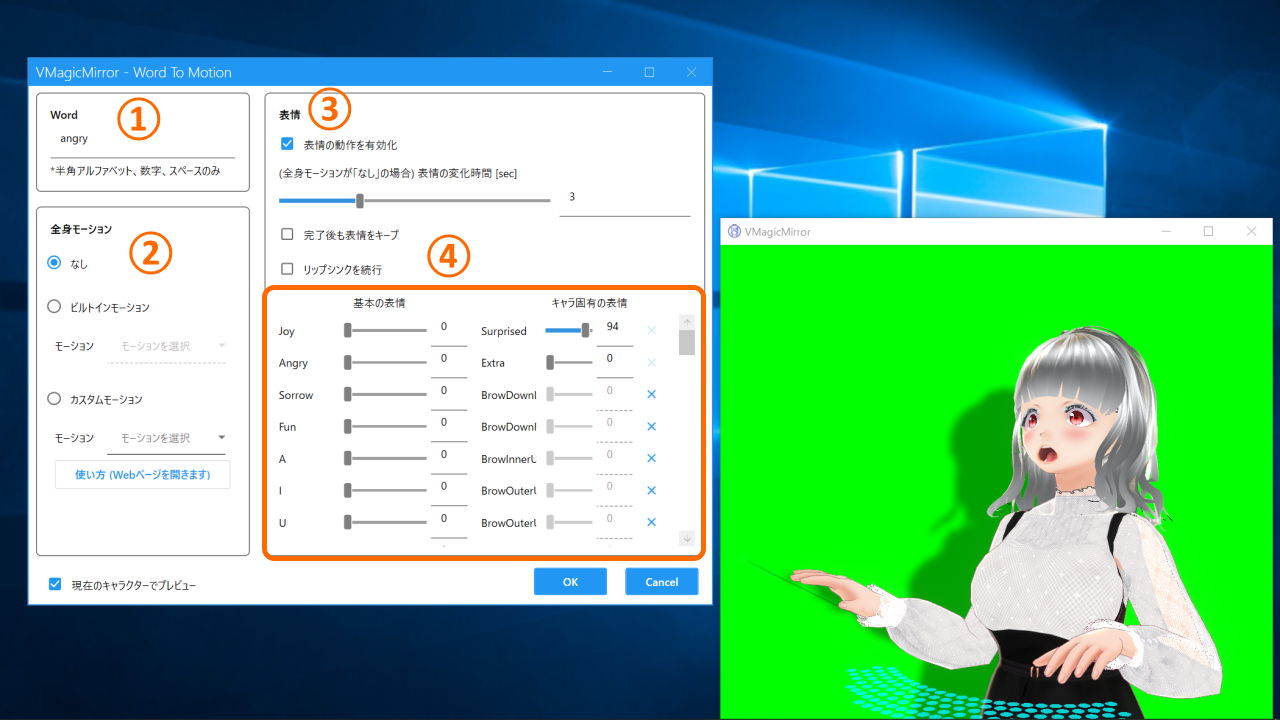
In custom window you can take 4 actions.
- Set the word to start this item. If you do not use
Keyboard (word)mode, then this work just for the name label. - Select motion type for this item.
- In v1.5.0 and older version only supports 3 built-in motions. If you do not need any motions and only need facial expression, then select
Nonemotion. - v1.6.0 and later version supports custom motion import feature. See detail at Use Custom Motion tips.
- In v1.5.0 and older version only supports 3 built-in motions. If you do not need any motions and only need facial expression, then select
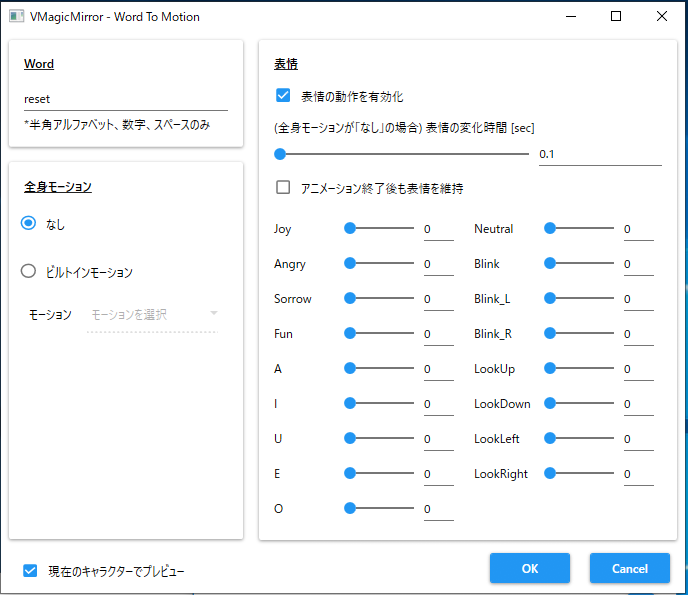
- Face expression setting.
- Turn on
Enable Face Expressioncheck to play some face expression in this item. Duration when Body Motion is None [sec]defines how long the avatar keep the face.Keep LipSync activeenables lipsync during the face expression is applied, for the blendshape without mouth motion.- If
Keep face after motionis on, then avatar face does not change after the duration.
- Turn on
- Set BlendShapes.
- NOTE: Basically, set only one blend shape to non-zero, and set other values to zero.
NOTE
v2.0.2 and later version supports accessory visibility control during the item is played in item edit window.
The accessory is visible during specified motion or facial expression is active.
If you choose MIDI controller for input device, you nees 3 steps to setup. Following tweet show how to setup.
#VMagicMirror
— 獏星(ばくすたー) / Megumi Baxter (@baku_dreameater) December 31, 2019
MIDIコンを叩くと表情が変わるやつの進捗です。
・コントロールパネル側で、MIDIコンと実行するアイテムのマッピング設定を開く
・MIDIコンのキーを叩いてセットアップ
・セットアップ完了したら再びMIDIコンのキーを叩く
の3手順で動きます pic.twitter.com/RDbsszWLpi
- Select
Device AssigntoMIDI Controllerand click edit button at the right ofKeys. - You will see
MIDI note assignwindow, so press up to 16 MIDI keys to use. Pressed keys appear onNote to Changecolumn. - After setting click
OKto complete setting.
After closing the window, try pressing the same keys to check the input works.
Hint
Keyboard (word) in Device Assignment: Please do NOT type special keys like Control/Shift/Alt during input word. When the typing is too slow, the word input is not recognized.
Gamepad in Device Assignment: When you select this option, the gamepad gripping motion is disabled.
Keyboard (num 0-8) in Device Assignment: When you select this option, the typing motion and touch pad motion is ignored.
Keep face after motion in custom window: If you use this option the face expression does not reset automatically, so you should have reset item. In default setting reset item works as you want.